Point of Sale
On this page
Point of Sale is where your till data comes into Spensa. One thing first: Spensa is not connected live to your till. Instead, you take the daily or period summary your till already prints or exports, and you upload it to Spensa as a PDF or photo, or email it in. Spensa reads the document automatically, turns it into a sales report, and builds a catalogue of everything your till sells. That gives you revenue charts, real sell prices for your menu items, and margin insights, without typing anything in. In some places the app calls a location an "establishment"; they are the same thing.
What this is for
- Upload your till's daily, weekly, or monthly summaries as PDFs or photos
- Email till summaries to a dedicated address, so they come in automatically
- Let Spensa read the location, the time period, and every sold item with quantity and price
- Review and correct a report side by side with the original document
- Approve reports to build and update your Point of Sale catalogue
- Keep the catalogue tidy: rename items, set categories, and link items to your menu items
- Group catalogue items with categories, each with a color and an optional tax rate
- See your revenue on the Point of Sale page and in Analytics
- Feed real sell prices and sold-item margins into Menu
- See live stock for drink products and what is still missing for every drink sale to count
Where to open it
In the left sidebar, click Point of Sale. The page shows three cards, Point of Sale Reports, Point of Sale Catalogue, and POS Categories, plus a revenue overview.
Detailed Point of Sale review and catalogue management are on the web. The phone app can capture and upload reports through More > Scan > Scan POS Report; see mobile scanning. The assistant can help with till data too: ask it questions about your sales, or let it upload and edit reports for you.
Access and permissions
Owners and admins can always use this. Managers can too. Point of Sale uses the same permissions as invoices: anyone who can view invoices can view till data, and anyone who can manage invoices can upload, edit, and approve reports and manage the catalogue and categories. You can give other company members access with a custom role. Staff members who sign in with a username do not see Point of Sale; it belongs to the management side of Spensa.
Uploading till reports
Upload a report that lists individual sold items, for example an end-of-day item breakdown, as a PDF, photo, or supported Excel file. A document containing only category totals or an overall total does not create a sales report.
- In the left sidebar, click Point of Sale, then open Point of Sale Reports.
- Click Upload Point of Sale Reports.
- Drag your files into the dialog, or click to choose them. You can upload up to 10 files at once, each up to 20 MB. Spensa accepts PDF, PNG, JPG, BMP, XLS, XLSX, and XLSM files.
- Check the two switches described below, then start the upload.
The two switches:
- Skip review after upload is on by default. Spensa then approves each report automatically as soon as it has found the location and the time period. Turn it off if you want to check every report yourself first.
- Process all images as one document appears when you picked two or more photos. It is on by default and treats the photos as pages of one document. That is right when you photographed a long paper report page by page. Spensa may still split the result into several reports if the pages contain more than one.
If Spensa finds a possible duplicate
Spensa checks whether you already uploaded the same file before. If it looks like you did, a message titled "Possible duplicate Point of Sale uploads found" lists the earlier uploads with their dates. Choose Review files to go back and change your selection, or Upload anyway if you are sure.
While Spensa reads your files
After the upload you land on a progress page: first "Extracting Point of Sale reports", then "Approving Point of Sale reports" if you left the review switch on. You can leave the page at any time; processing continues in the background. When Spensa is done, you are taken to the review page.
If a file contains no sales report with individual items, or cannot be read, the upload shows as failed. Failed uploads appear in a strip at the top of the reports list, where you can dismiss them. For a totals-only summary, export the item breakdown from your till and upload it using the steps above. If a document clearly confirms there were no sales, Spensa records that result without creating an empty report. In a file containing several reports, only those with individual items become reports for review or approval.
For emailed reports, the "No Point of Sale reports were found" warning appears only when neither the email body nor its attachments produced a report. Spensa waits for the other sources in that email to finish processing before showing this warning. A verified report with no sales also counts as a report. Unreadable files and other processing errors still appear so you can check them.
What Spensa reads out automatically
A single file can contain one or several sales reports. For each report, Spensa reads:
- Which location it belongs to. Spensa compares the names on the document with your locations and picks the match. If it is not sure, it leaves the location empty for you to choose.
- The time period it covers. A report for one full day is stored as that whole day.
- Every sold item, with its name, quantity, price, the item code from your till (shown as Item ID), and a fitting category from your POS categories.
Spensa only takes genuine sold items. Summary lines, totals, tax lines, payment methods, discounts, tips, and voided rows are left out on purpose. Spensa also never invents categories; it only uses the ones you already have.
Reviewing a report
A report waits for you with the status To Review when you turned off "Skip review after upload", or when Spensa could not find the location or the period on its own. In the second case you also get a notification, "Point of Sale report needs review", that takes you straight to the upload.
The review page shows the original document on one side and the extracted reports on the other.
- Every item Spensa found is highlighted in the document. Hover over a row to see where it came from, or click a highlight to jump to the matching row. The magnifier button on a row (Show item in document) zooms the document to that spot. Use Show boxes and Hide boxes to turn the highlights on or off.
- A Download link lets you save the original file.
- Each report is a card showing its status, location, period, and item count. When one upload produced several reports, they are numbered.
Fixing the location and period
- Open the report card.
- Pick the location in the Establishment field.
- Pick the time period with Select date range.
On a report that is still to review, these changes are saved automatically.
Editing sold items
Click a row to open it, or click Add Item to add a row Spensa missed. For each item you decide what should happen in your catalogue:
- Link to Existing Item: the sold row is counted on an item that already exists in your Point of Sale catalogue. Pick it from the list. You need to select a location first, because each location has its own catalogue.
- Create New Item: the sold row becomes a new catalogue item when you approve. Its switch Try to match an existing item is worth knowing: when it is on, Spensa first looks for an existing catalogue item it can confidently reuse, for example one with the same item ID or name, and only creates a new item when there is no clear match.
On the report card, a small colored dot shows the plan for each new row: blue means Spensa will reuse an existing catalogue item when it finds a confident match, green means a new catalogue item will be created.
You can edit the Sold item name, Item ID, Quantity, and Unit price. Spensa calculates the Total price for you. To remove a row, open it and use the trash button. If an upload contains a whole report you do not want, click Remove on that report card.
Approving reports
- Open Point of Sale > Point of Sale Reports, choose To Review, and open the upload.
- Check the location and reporting period against the source document.
- Check the sold quantities, prices, and catalogue matches. Correct rows or remove reports that should not be included.
- Click Approve Point of Sale Reports (Kassenberichte freigeben in German) in the page header.
- Wait for Approved, then open the catalogue or Sales analytics to verify the resulting items and period.
A report can be approved when it has a location, a start and an end for its period, and at least one item, and when every item is either linked to a catalogue item or has a name or an item ID. If the button is grayed out, point at it to see what is still missing.
What approval does
Approving turns a draft into a permanent sales report. While Spensa works, the report shows as Finalizing, then Approved. Approval also:
- Creates the new catalogue items you chose, and links every sold row to a catalogue item.
- Updates the catalogue items that were sold: the name is refreshed, a missing item ID or category is filled in, and the latest prices are stored. If an item you removed earlier is sold again, it returns to the catalogue.
- Carefully links newly created catalogue items to your menu items. Spensa only links an item when it is confident it is the same dish or drink; it does not match different sizes or variants, and it never changes links you already set yourself. You can adjust every link later in the catalogue.
The reports list
Open Point of Sale Reports from the Point of Sale page to see everything you have uploaded.
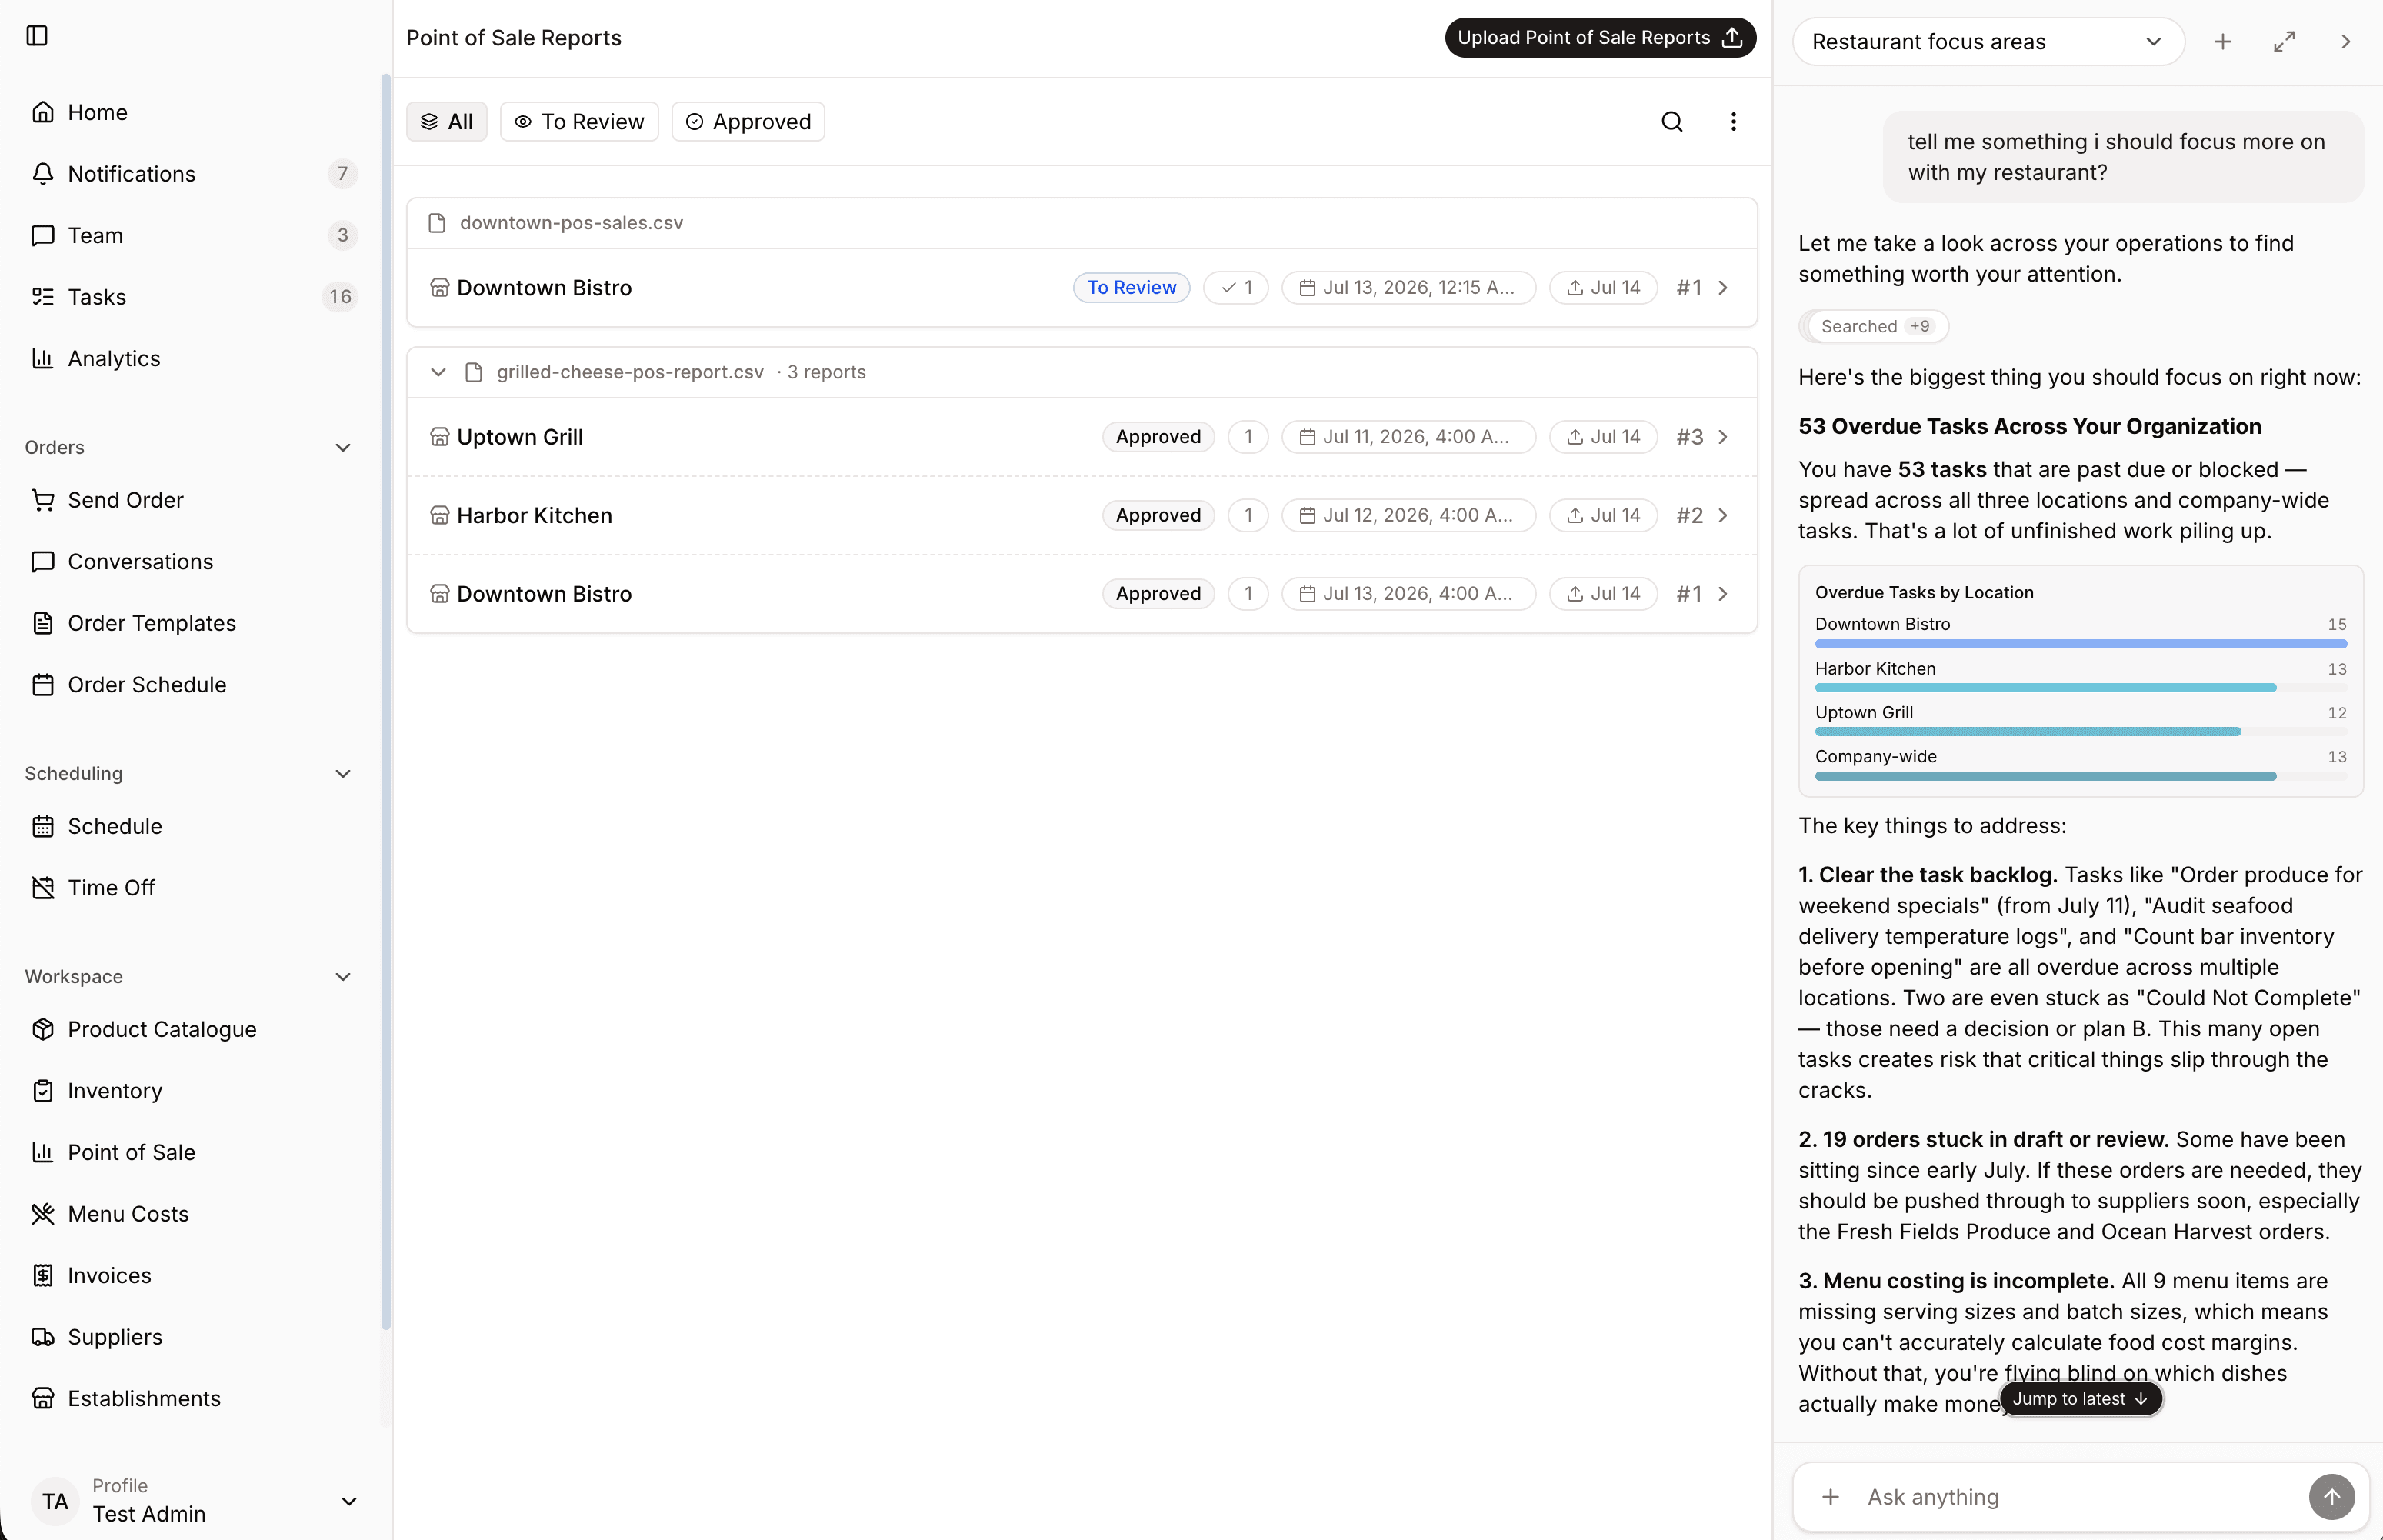
- Use the pills All, To Review, and Approved to filter by status.
- The search box finds reports by location name, item names, and file name.
- Reports are grouped by upload. Each group shows the file name, how many reports it contains, an overall status, and the date ranges. Each report card shows its location, status, item count, period, and upload date, plus a number when the upload holds several reports.
- Click a report to open its review page.
- To delete several reports at once, open the three-dot menu, choose Select Reports, tick the reports, and delete. Deleting removes the reports and their items for good, so Spensa asks you to confirm. You can delete up to 100 reports at once. Reports that are currently finalizing cannot be deleted.
- Uploads that are still processing, and failed ones, appear in a strip at the top of the All view. Failed uploads can be dismissed there.
What you can still change after approval
Approved reports are not frozen, but a few rules apply:
- Items can still be added, edited, and deleted, but every item on an approved report must be linked to a catalogue item. Categories then come from the catalogue item, not from the row.
- The period can still be changed. Edits on approved reports are saved with the Save Changes button in the header.
- The location is locked. An approved report cannot move to another location.
- Approval cannot be undone. If a report is wrong beyond repair, delete it and upload the file again.
The Point of Sale catalogue
The catalogue is the list of everything your till sells, as your till knows it: one entry per item and location, with the item ID from your till, the latest prices, a category, and a link to the matching menu item. It fills itself as you approve reports. There is no button to create catalogue items by hand; if you ever need one, the assistant can create it for you.
Open Point of Sale Catalogue from the Point of Sale page.
- Each card shows the item's name, its item ID, its location, its category, the linked menu item, the date of its latest report, and its latest price.
- Search items by name. Open the Display menu to sort by name, latest report start date, latest report end date, or creation date, in either direction. By default, items from the most recent reports come first.
- Open the Filter menu to filter by location and by category, including subcategories, or choose Without linked menu item. Active filters are shown above the list; Clear all filters removes them all.
- If you can manage till data, you can change the linked menu item directly on the card.
- To delete several items, switch to selection mode and delete up to 200 at once.
Find items without a menu link
Use the web app with permission to view POS data. You need permission to manage POS data to add a link.
- Open Point of Sale > Point of Sale Catalogue.
- Click Filter, then Without linked menu item. The active chip confirms the filter.
- Optionally choose Products or Add-ons, and use Filter > Establishment or POS category to narrow the list further.
- Link an item using its menu-item selector. After the link is saved, it leaves the filtered list.
- Click the filter chip to remove it, or Clear all filters to clear the link, location, category, and search filters.
Editing a catalogue item
Click an item to open it. Changes are saved automatically. You can edit:
- The Name (required) and Item ID.
- The POS category and subcategory.
- The Linked menu item. The list shows a recommended match at the top and lets you search your menu items. If you can also manage the menu, recipes that are not on the menu yet are listed too, marked as recipes; linking one puts it on the menu and fills a missing sell price from your approved till data. View menu item jumps to that menu item.
Below the form you see the most recent approved reports that include this item, up to 20. Click one to open it.
Link a sold item to your menu
Use the web app with permission to manage POS data. Create the matching dish in Menu first.
- Open Point of Sale > Point of Sale Catalogue.
- Search for the sold item and open the record for the correct location.
- Click Linked menu item, search for the dish or recipe, and select it. Check the portion or variant before accepting a suggested match.
- Wait for the automatic save. Use View menu item to open the linked dish and check its linked POS entry and selling-price source.
A saved link feeds sales and margin reporting. It does not subtract ingredients from inventory.
See live inventory for drinks
LIVE inventory works out the stock of your drink products between counts: the last count, plus deliveries since then, minus what approved till reports sold through your recipes and minus recorded losses. It is an estimate for planning, covers drinks only, and does not change your counts. It needs access to Point of Sale, menu costs, and inventory.
It works with whatever you have. With counts alone you see what is on the shelf and how it changed between counts. Deliveries, till sales, and orders each make the numbers more exact.
- In the left sidebar, click Inventory, then LIVE inventory. Each location has its own stock. If your company has more than one location, the page opens on the one with the newest till report, or the one counted last, and you can choose another at the top right.
- The box at the top says what the numbers are based on: the count and the day till sales are known up to. Under it is everything that would make the numbers right, most important first, each with a link to fix it: a newer count that is not finished yet (with any count lines that look like packs were saved instead of single bottles), days without a till report, orders past their delivery day, delivery notes waiting for review, and invoices that are not reviewed yet.
- Stock opens with the value of your stock over time: a dot at each count, the line between them from sales, deliveries, and losses, and a dashed end for days without a till report yet. Below it, every counted product is shown as days of stock left. Products that are empty are gathered in one line at the top, marked with a red dot and their names; click it to list them, or click See what to order to go to the Order tab. Each empty product also has a red dot in front of its name. Without till sales it lists what is on the shelf instead. Use the status chips, the category chips, the search field, and the sort options to narrow it. The dashed line marks three days of sales. When an order is on its way, the bar continues as stripes for the days the order will cover, and the product says how much arrives and when. Ordered, on the way lists the products that would need ordering but are already covered by an open order. Needs a count lists products that drinks use but that have no count. No sales linked lists products that were counted, but that no drink sold on the till takes off the stock.
- Click a product to see everything about it: the stock, what it is based on, and one line with one action for anything that is not right. The chart shows the whole history: counts as dots, the stock between them as a line, and the forecast as a dashed line. An open order adds a dashed line on the day it arrives, the legend says how much it brings, and the forecast steps up on that day. With several open orders, each delivery day has its own line, and the product says what comes first and how much more follows. What happened lists every count, delivery, sale, and loss, newest first, with the stock after each. Click Sold on a day to see which drinks took how much, and click the link under a line to open the count, invoice, delivery note, or order behind it.
- To record a broken, spoiled, or given-away bottle, click Record a loss on the product, enter how much and why, and click Record loss. The stock updates at once. You need permission to record waste.
- Order shows what to buy. It needs till sales to know how fast things run out, and says so when there are none. The first line says how many products are empty, how many run out within three days, and how many are already on their way. Each supplier you should order from today is open, with the products, when each runs out (an empty product has a red dot), and how many packs to order. Click Create order draft to put that supplier's suggested packs into a draft order, including the products that are only running low; check it and send it from Orders. Once a draft exists, the button opens it instead (Open the draft), so the same order is never prepared twice. With several suppliers, Create order drafts for ... suppliers prepares all of them at once. A draft does not change the stock or the suggestions; they change once the order is sent. The last line shows the approximate order value, whether it is below the supplier's minimum order, and the earliest delivery day. If the supplier's delivery days were never set, it says Set the delivery days of ... instead; set them on the supplier page. A product whose recipes take far more than you buy says Check the recipe first and is left out of the draft, and a supplier with only such products is not counted in the first line. A product you already ordered is not suggested again: it moves to Ordered, on the way until the order arrives. Only when what is on its way would run out within three days of arriving does it stay in the list, with how much arrives and when, and how much more to order.
- Also worth a look holds suppliers whose products only run low, products that are ordered and on their way, orders that have not arrived (one line per order, with its due date, what it should bring, whether its delivery note is still being read, and Open the order), products that were billed differently than delivered, counts that look far too high, and stock that is barely selling.
- Insights opens with a summary for owners: whether the stock numbers can be trusted yet, what is unexplained at the last count, what is tied up in slow stock, what empty days cost in sales, the three things to do first (each with a button; See them opens the products right below it), and what is going well. Advice to order more or less leaves out products whose numbers do not add up: stock that sold more than was recorded, recipes that take far more than is bought, and products bought far more than the drinks use (the kitchen or cakes probably use them too). Below it is the value on the shelf and how it changed since the last count. The chart shows the value day by day, with a dot at each count. Click By category or By supplier to split it. Below it, click a line to open it:
- What to improve lists at most five findings, each with an amount and what to do. Click one to see the products behind it.
- Difference at count compares what the records added up to with what was counted, product by product, and says what the likely reason is.
- What the latest count covered shows which products were counted, which are new, which were left out, and which storages were counted in which count.
- Compare two counts shows what went up and down between any two counts.
- Setup shows one number: the share of drink sales whose stock you can trust. The bar and its legend show the rest: drinks that are linked but whose stock is not known yet, and drinks not linked yet. A drink is linked when its POS item is linked to a menu item, the recipe has ingredients, every ingredient is a product with a usable amount, and every product was bought and counted at least once. Its stock can be trusted once it starts from a count with till reports after it. Get to 100% lists every step, biggest effect first, including linked drinks whose stock is not known any more because a product they take was last counted too long ago (Count ... products again). Below Get to 100% is the list of what would make the stock numbers right. In Get to 100%, click a line to see the products or drinks it covers, then click one to open the place where you fix it.
- To let the assistant do the linking, click Set up with AI in Setup. The assistant opens with a request for the selected location; send it as it is or add what it should know, for example which wine you pour by the glass. It links POS items to menu items, creates missing menu items with the POS price, writes drink recipes from what you buy and count and adds products drinks use to a storage so they get counted. Recipes only contain products you buy: tap water, soda from the carbonator, hot water and ice from the machine are left out. It does not change drinks that are already set up unless something is clearly wrong, and it asks about what it cannot decide. To take its changes back, ask the assistant in the same conversation to undo them. Changes you made by hand after the setup are kept. The button needs permission to manage POS items and the menu.
- In Setup, click All drinks, step by step to follow a single drink from the POS item to the stock count. A dashed box is a missing link and a shaded box needs a check.
The same stock and chart are on the product itself: open a product and click Inventory. If the product is kept at several locations, the LIVE inventory card shows them together: the total, one chart with a line per location, and one row per location that opens to show its details. Locations where the product was never counted, sold, or delivered are left out. Click Show every count, delivery and sale for the full list of movements.
In Analytics, the Inventory tab shows the same overviews for the chosen location under Drinks, day by day: the value of the drinks between counts, what to improve, the difference at a count, what the latest count covered, and two counts side by side.
How the numbers are worked out:
- The count date is the date shown on the count. A count started before 15:00 is treated as taken before service, so that day's sales and deliveries come after it. If you enter a count days after the shelves were counted, set the count date to the day they were counted, or every sale in between is taken off twice.
- A delivery note says what arrived and when, so it decides the stock. An invoice only adds what no delivery note covers. If the invoice bills more or less than the delivery notes show, the page tells you and does not change the stock. If so much is missing that delivery notes were clearly not uploaded, the rest is added on the invoice date.
- An order sent through Spensa shows as expected until its delivery day. An order sent "as soon as possible" has no delivery day, so Spensa expects it after the time the supplier usually takes: what your orders to that supplier with a delivery day asked for (from three such orders on), otherwise the next day. It moves to the next day the supplier delivers on if you set its delivery days, and never falls on a Sunday if you did not. The product's history says so next to the expected delivery. The earliest delivery day on the Order tab uses the same rule. It is not in the stock yet, but the order suggestion takes it into account. When the stock already sold more than the records hold, nothing more is suggested on top of an open order, because that empty stock is not what is on the shelf. If nobody marked it as arrived, it shows as overdue the day after its delivery day. If a delivery note for it was uploaded but is still being read, it says so instead of "not marked as arrived", and the note's quantities count once it is read. From the second day after, it counts as delivered on its delivery day, unless a delivery note says what came instead. An order marked as arrived counts with its own quantity when its delivery note has no line for the product, or a line whose quantity cannot be turned into the product's unit. Once its invoice is in, the invoiced quantity counts. A delivery note or invoice that belongs to another order never closes an open one.
- An invoice that is not reviewed yet already counts as a delivery, as long as it has a supplier, its lines are matched to existing products, and it is not a second copy of another invoice. When the same invoice came in twice, the first copy counts.
- Counts started on the same day are one stocktake: each storage keeps its own quantity, a storage counted twice keeps the later count, and a product kept in two storages adds up. The stocktake counts as before service only when every storage was counted before 15:00.
- A count that covers only some storages does not replace the stock of a product whose storage it left out. That product keeps running from its last full count.
- Days after the count without a till report get the usual sales of that weekday, marked as estimated. Weekdays that never have a till report count as closed. With more than seven such days the stock would be mostly a guess, so the product asks for a new count instead.
- A loss counts from the moment it is recorded for. A loss dated before the last count, or recorded while the shelves were still being counted, is already inside that count.
- A till report that covers several days is spread evenly over them.
- A drink takes off what its recipe says, including the waste share. A house-made mix takes off its ingredients in proportion to how much of the batch the drink uses.
- Stock is never shown below zero. When more was sold than counted and delivered, the product says how much is unexplained.
- Run-out days follow your sales per weekday over the last 30 days of till reports, so a busy Friday counts more than a quiet Monday.
- Order quantities cover at least seven days from today, or until the delivery after the next one if that is later, rounded up to whole packs.
- Moves between storages of the same location do not change the stock.
- A till button without a price whose drink is rung up on an option line, such as a generic longdrink button, is not counted as a drink of its own.
- Values use each product's latest purchase price, so a price change never looks like more or less stock. Comparing two counts only compares the products that are in both. A count that looks far too high for what the product sells is left out of the value until it is checked.
- An invoice or delivery note without a location counts when the company has one location. With several locations it counts for none, and the page says how many there are.
- A till item that was archived no longer shows in Setup, but what it sold before still counts as sold.
- A difference at a count is only judged when till reports cover most of the days since the count before; otherwise the missing sales would look like missing stock. It is called unexplained only after the usual reasons are ruled out: a count in the wrong unit, a delivery that was not recorded, a product nothing sold is linked to, or a difference small enough to come from pouring. Gifts and staff drinks that were not recorded look the same as any other unexplained loss.
Spensa does not send orders from this page. Garnishes, optional ingredients, and ingredients without a product of their own, such as hot water, are shown but do not decide whether a drink is live.
Removing catalogue items
Use the Delete button on the item page, or select several items on the list. If an item appears in any approved report, it disappears from the catalogue but its sales history stays intact. If it was never part of an approved report, it is deleted completely.
If duplicates have crept in, ask the assistant to merge two catalogue items into one. All sales rows from both end up on the item you keep.
POS categories
Categories group the items your till sells, such as food, wine, or coffee. Spensa uses them on report rows, catalogue items, and filters.
Every new organization starts with six ready-made categories: Food, Wine, Beer, Spirits, Non-Alcoholic, and Coffee / Tea. They appear in your language automatically. You can edit or delete them like any other category.
- Open POS Categories from the Point of Sale page.
- Click Add Category to add your own. Give it a name, pick a color, and set a tax rate if you want (0 to 100 percent).
- To refine a category, add subcategories to it. A subcategory can have its own tax rate; leave the field empty and it uses the category's rate.
Each category card shows its color, how many POS items use it, and its tax rate. Deleting a category or subcategory removes it from all items that use it; the items themselves stay. You can create up to 250 categories, and up to 100 subcategories per category.
Emailing reports in
Each location has its own email address for till reports, in the form yourcompany.yourlocation.pos@documents.spensa.ai. Anything sent there is processed and approved automatically, so this is the easiest way to keep Spensa fed every day.
- Go to Settings and open Inbound Emails.
- In Addresses, click View addresses, then copy the Point of Sale address for the correct location.
- Send or forward your till summaries to that address as attachments. Many till systems can email their end-of-day report on their own; point them at this address.
- Open Point of Sale > Point of Sale Reports and check for the imported report. If the body or an attachment contained a report, the other sources in that email will not cause a missing-report warning. If neither contained a report, check the email and send the correct summary.
Because the address belongs to one location, Spensa always knows which location the report is for. If Spensa cannot read the time period, the report waits with the status To Review and you get a notification. If the sales summary is in the email text itself rather than in an attachment, Spensa reads that too. Emails and files you already sent before are skipped quietly.
The same settings page keeps a history of received emails, with the sender, the subject, and how each attachment was handled.
Emailing reports in is available on certain plans. If your plan does not include it, you will see an upgrade note.
Where your sales data shows up
Sales from approved reports appear in several places:
- Revenue on the Point of Sale page. A chart of your revenue over time, with quick ranges (All, 1y, 3M, 1M, YTD, MTD) and a location filter. It fills automatically once reports are approved.
- The Sales tab in Analytics. The same revenue view, plus the sold item margin map: every bubble is a menu item linked to a catalogue item, placed by sales value and average sold price, sized by quantity sold, and colored by margin. Click a bubble to open the menu item. You see the margin map only if you can also view menu costs; items without a price or a complete cost are left out, and the chart says so.
- Sell prices in Menu. When a catalogue item is linked to a menu item, that menu item's sell price can come from your latest approved till data. Such prices are labeled "Point of Sale" rather than "Manual entry", and the price history charts include them. A menu item's page also lists the till items linked to it.
How this connects to other parts of Spensa
- Menu - linking catalogue items to menu items feeds real sell prices and sold-item margins into your dish margins.
- Analytics and Home - the Sales tab in Analytics shows your revenue and the sold item margin map.
- Invoices - invoices use the same permissions and the same kind of upload, review, and email flow, so if you know one, you know the other.
- Settings and billing - the email addresses for sending reports in live under Settings, in Inbound email, and your plan's monthly allowance covers the automatic reading.
- Notifications - Spensa notifies you when a report needs review before it can be approved.
- Assistant - the assistant can answer questions about your sales, upload and edit reports, tidy the catalogue, and manage categories.
- Inventory - till sales do not change your stock. Inventory counts only change when you count or record them there.
- Team and permissions - control who can view and manage till data with roles and custom permissions.
Good to know
- Spensa is never connected live to your till. Only what you upload or email in ends up in Spensa.
- Till sales do not reduce your inventory counts.
- Reading reports automatically counts toward your plan's monthly allowance. When it is used up, new uploads are paused and you see "Upload blocked by your current plan." Uploading works again when the allowance renews or after an upgrade.
- You can upload up to 10 files at once, each up to 20 MB. One file can contain several reports; Spensa splits them for you.
- A report covering one full day is shown as a single date.
- Approval cannot be undone, and approved reports keep their location.
- You can delete up to 100 reports and up to 200 catalogue items in one go.
- You can create up to 250 POS categories, and up to 100 subcategories per category.
- Check tax categories when reviewing sales and Menu. Gross sales and net ingredient costs need the correct tax rate for meaningful margins.
- If you rename one of the six ready-made categories, it keeps your new name in every language. Rename it back and the translated name returns.
- If a catalogue item you removed is sold again on a newly approved report, it comes back to the catalogue with its history.
Add-ons and preparation instructions
Each catalogue item can be classified as a product, add-on, preparation instruction, or unresolved modifier. You can change this on the catalogue item's page or while reviewing its linked report row. A saved catalogue change applies to that item across reports. New imports keep the saved classification when they identify the same catalogue item.
Use Add-on for a known extra portion, then link it to an entry in the Menu add-on library. A preparation instruction such as “cut into pieces” is tracked without an ingredient effect. Leave included choices and substitutions unresolved until their ingredients are clear. A label such as “included” does not by itself mean that the price is zero or that an extra portion was used.
The Add-ons filter includes sales by add-on and location, with a date range. Reports covering multiple days are prorated over their reporting period. Cost and margin use the current recipe and require permission to view the menu. Missing prices stay unknown; explicitly free selections retain zero revenue. Unlinked add-ons show Needs add-on setup.
Aggregate POS reports do not identify which dish received each extra. Spensa therefore keeps these sales separate and does not infer parent dishes, substitutions, or inventory outflows.