Settings and billing
On this page
Settings is where you manage the company around the daily work: locations, users, categories, language, inbound email, account settings, billing, and plan limits. Use this page as a tour of the settings area, then jump into the feature-specific guide when you need the full workflow.
What this is for
- Change your company name.
- Manage company settings, product categories, menu categories, and language.
- Find inbound email addresses for invoices and till reports.
- Manage teams from Teams, if it appears in your settings menu.
- Open your personal account settings.
- Review your plan, locations, and monthly automatic-work usage.
- Update payment details or arrange a plan change.
- Understand what happens when plan limits or payment issues apply.
Where to open it
On the web app, open the settings area from the left sidebar. Settings has its own menu with one entry per page described below. Settings belong to one company at a time. If the app says "establishment" somewhere, that means a location.
The phone app has its own smaller settings screen. It is described in The phone app.
Access and permissions
What you see depends on your role. Admins see every page, including General and Billing. Managers can manage staff accounts on the Users page but do not see General or Billing. The Billing page needs permission to manage billing; by default only admins have it. The Inbound email page needs permission to view invoices.
Everyone can change their own language. The Account page is only for company members who sign in with an email address. Staff members manage their password in the phone app or ask an admin.
Settings pages at a glance
- General - company name and rare company-level actions.
- Establishments - your locations with their addresses and time zones.
- Users - company members, staff accounts, roles, and permissions.
- Product categories - categories shown in product lists and filters.
- Menu categories - menu sections and recommended markups.
- Tax categories - selling tax rates used to calculate net sales and margins in Menu.
- Language - your personal web app language.
- Inbound email - addresses for sending invoices and till reports into Spensa.
- Teams - the teams of your locations, with their members and positions.
- Offline orders - phone app information for ordering without internet.
- Account - your profile picture, email addresses, password, privacy preferences, and account deletion.
- Billing & Usage - plan, locations, payment portal, and monthly automatic-work allowance.
General: your company name
This is where you change the name of your company as it appears in Spensa.
- Open General in the settings menu.
- Change the company name.
- Save.
The page also shows how your company and its locations belong together.
Delete or leave your company
Two rare actions live here too:
- Delete Organization removes the company and everything in it. Only admins can do this. You confirm by typing DELETE. This cannot be undone.
- Leave Organization removes you from the company. Your shifts from today on are deleted. Your past work stays with the company under your name, and you need a new invitation to come back. You confirm by typing LEAVE. If you are the only admin, Spensa refuses and asks you to hand over ownership to another member first.
Establishments: your locations
Establishments lists every location of your company. It appears in the settings menu for people who can manage locations. Search the list, or filter it by city, country, or whether a location's details are complete.
To add a location (you also need permission to manage billing):
- Open Establishments in the settings menu.
- Click New Establishment.
- Under General, enter the Establishment Name and pick the Time zone. The time zone is used for order schedules and supplier delivery cutoffs.
- Under Delivery Address, fill in Official Name, Company Name, Address Line 1, Postal Code, City, and Country. If invoices should go to another address, tick Use a different billing address and fill in that address too.
- Click Create. The new location appears in the list. Adding a location increases your subscription, see Each location changes your price.
To change a location, click it in the list, edit the details, and click Save.
Users: your team and staff
The Users page is where you invite company members, create staff accounts, and set what each person may do. It has two tabs: one for company members who sign in with an email, and one for staff members who sign in with a username. The full walkthrough is in Team and permissions.
Categories: hide what you do not use
Spensa comes with a standard set of product categories. On this page you can hide the ones your business never uses, so they stay out of your lists and filters. How categories are used on products is described in Products.
Menu categories: your menu sections
Menu categories are the sections of your menu, like starters, mains, and desserts. Each category has a recommended markup. Spensa uses that markup to suggest a sell price for every dish in the category. How this plays into dish pricing is described in Menu.
Language
Pick the language Spensa uses for you.
- Open the language page in the settings menu.
- Click your language in the list.
The web app offers ten languages: English, German, Serbian, Croatian, Turkish, Vietnamese, Chinese, Japanese, Korean, and Thai. The sign-in and sign-up pages also have a language switcher at the top right. The phone app has its own language setting with fewer choices; see The phone app.
Inbound email: your addresses for invoices and till reports
Spensa gives your company its own email addresses. Send or forward an invoice to your invoice address, and it lands in Spensa and gets read automatically. The same works for till reports. This page shows your addresses so you can save them in your mail program or give them to your accountant.
- Invoice addresses end in
@documents.spensa.aiand contain a code that is unique to your company. - You can also get separate addresses per location, so Spensa knows which location a document belongs to.
Sending in documents by email is available on certain plans. If your plan does not include it, you will see an upgrade note. See the plan table below. How invoices are processed is described in Invoices; till reports are described in POS.
Teams
Teams lists the teams of all your locations, such as Kitchen or Service. Teams are used for the staff schedule, news, and team chats. It appears in the settings menu for people who can manage teams for the whole company. Creating and managing teams is described in Teams.
Offline orders
This is an information page about the phone app. It explains that you can create and send orders on your phone even without internet, and links to the App Store for iPhone and Google Play for Android. The app itself is described in The phone app.
Account: your email addresses and password
This page is about you, not the company. It is only there for company members who sign in with an email address.
Email addresses
Your account has one primary email address and can have extra addresses. Click Change Email below the address list, enter the new address, and click Next. Verify it from the email Spensa sends, then return and click Done. The verified address becomes your primary email.
See Account and profile for the complete walkthrough. The menu beside an additional address lets you resend verification or remove it.
Password
Change your password by entering your current one and a new one of at least 8 characters. After the change, you are signed out on all other devices. If you do not remember your current password, click Send Reset Email and Spensa emails you a reset link.
Delete your account
At the bottom of the page you can delete your account for good. Your login and personal data are removed; work you did for your companies stays with them under your name. Read the confirmation dialog and click Delete Account to confirm, or Cancel to keep your account. If you are the only admin of any company, Spensa refuses; hand over ownership or delete that company first.
One thing you will not find here: a name field. Your display name belongs to each company you are part of, and an admin can change it on the Users page.
Billing: your plan and your usage
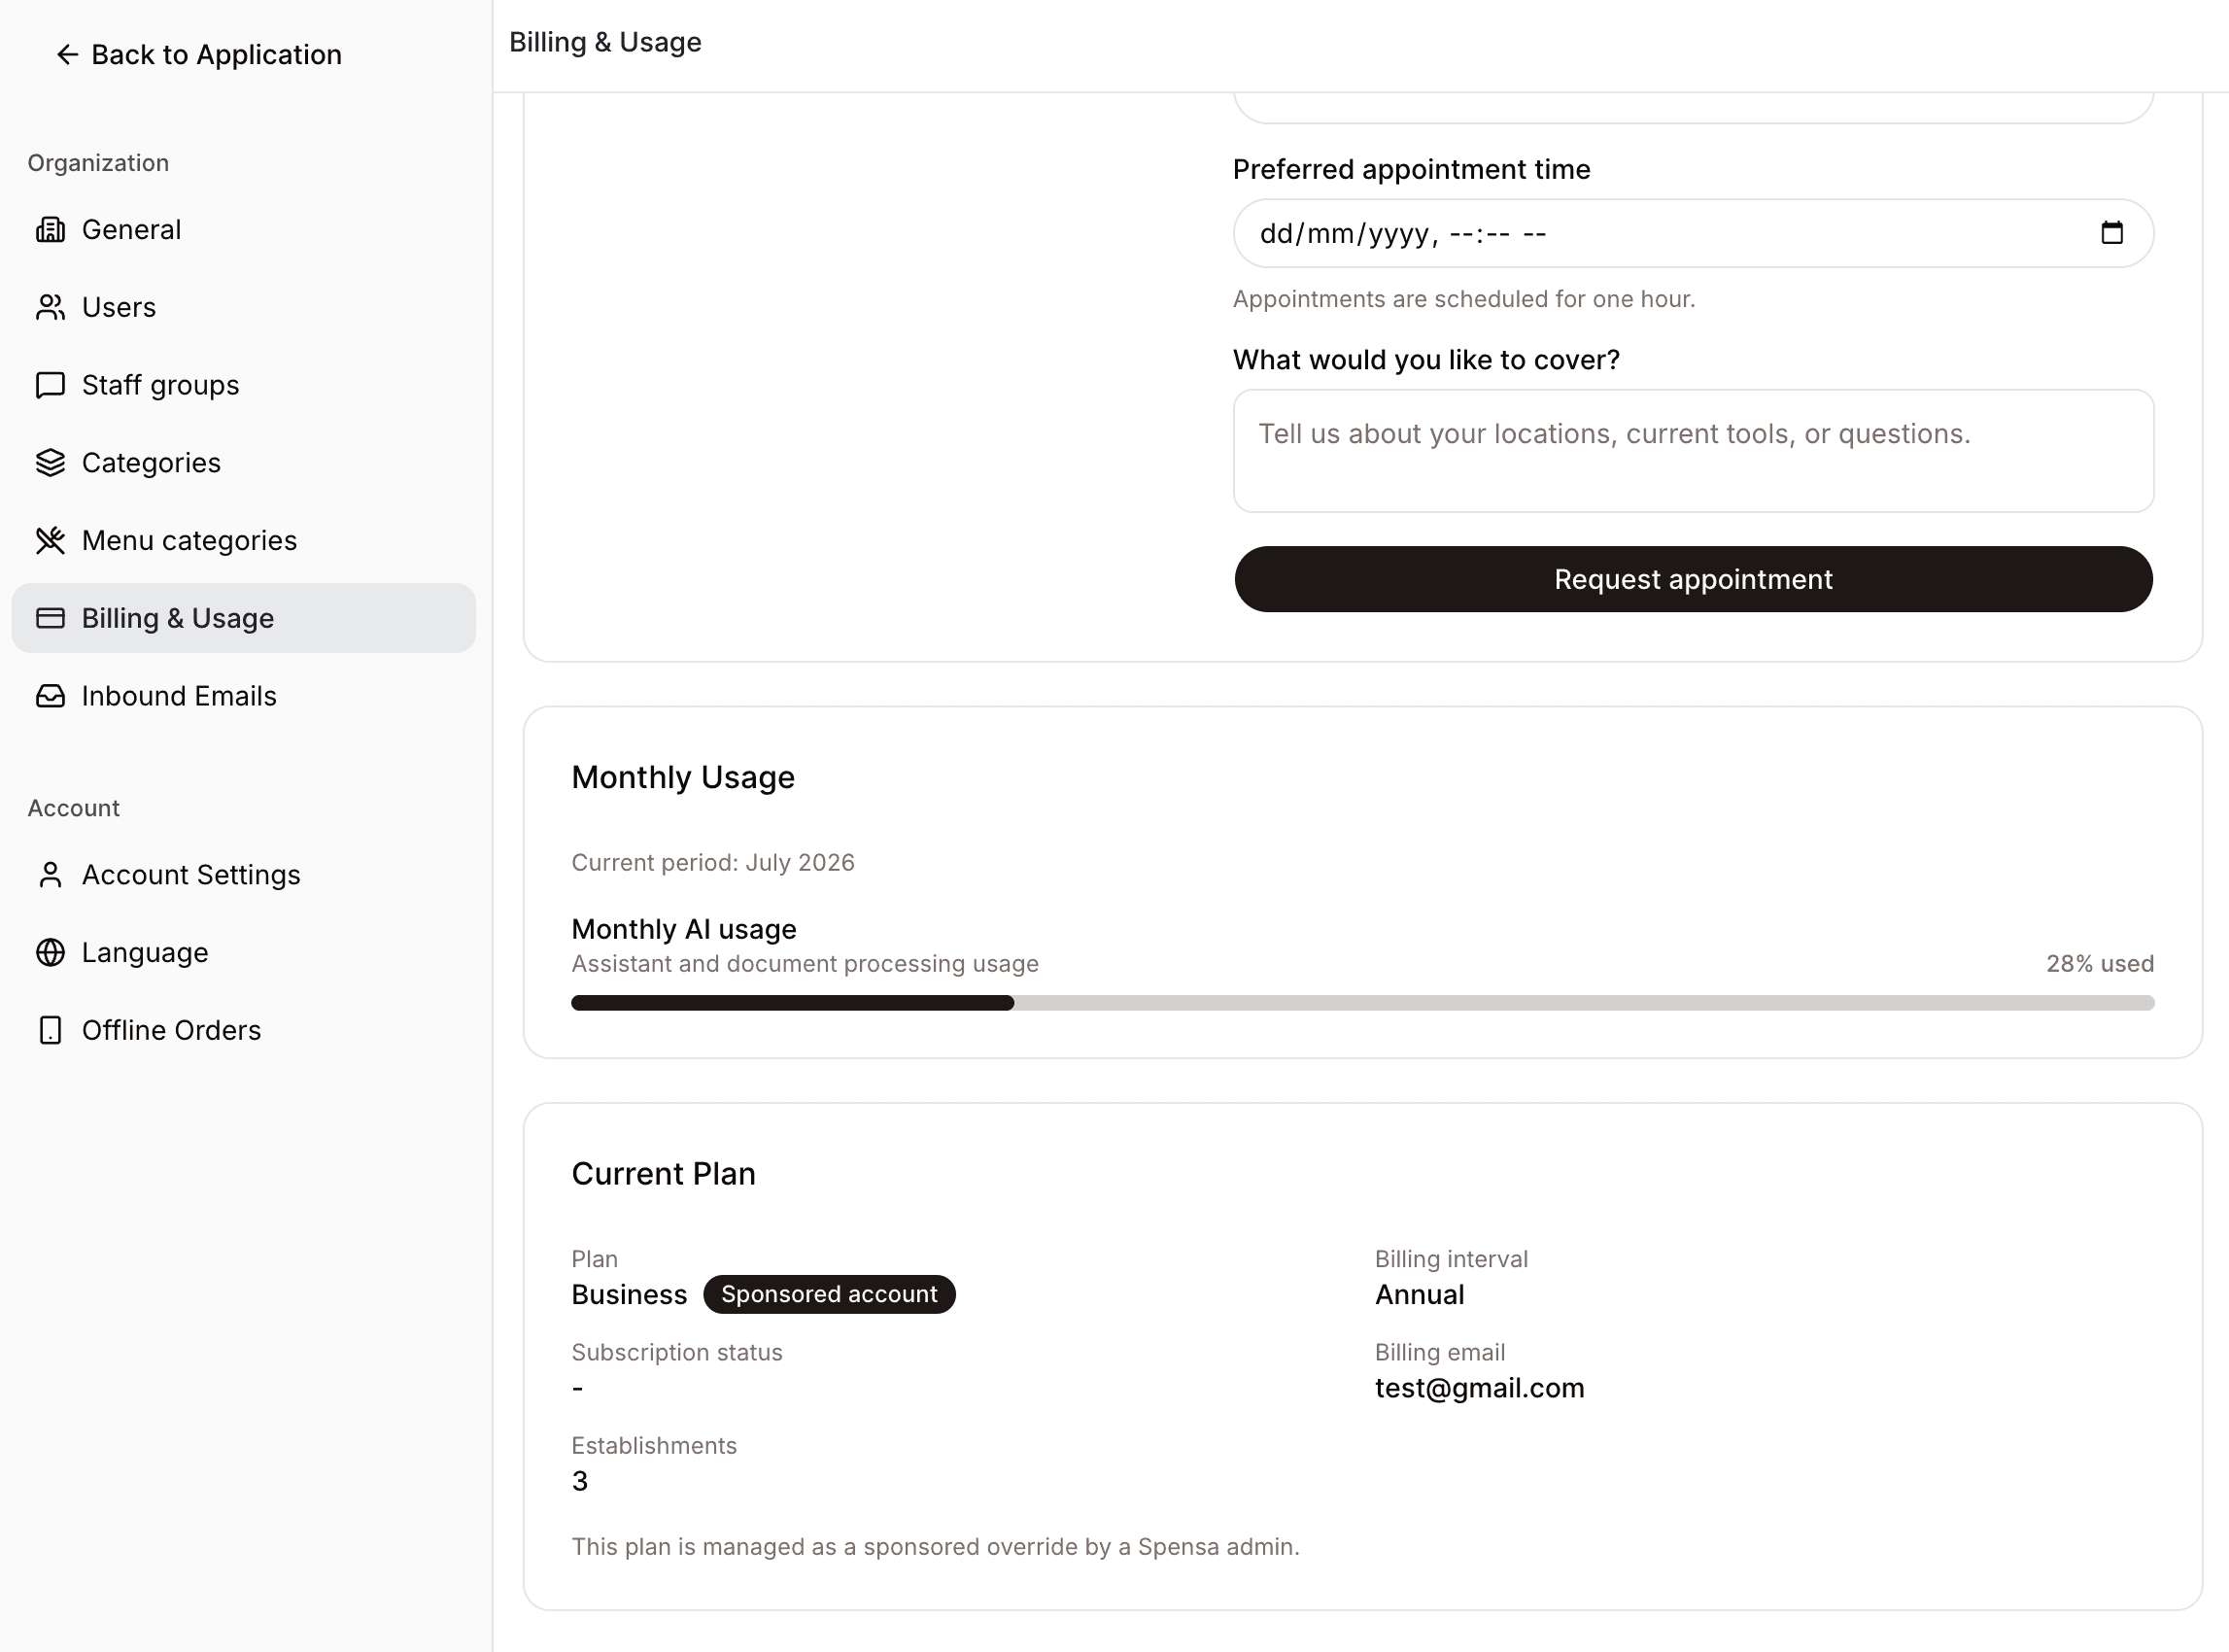
The billing page is called Billing & Usage. It shows your plan, your payment status, your monthly allowance for automatic work, and a form to book an appointment with Spensa.
The three plans
Spensa has three plans: Free, Basic, and Business. Prices are in euros and are agreed directly with Spensa; the website shows no price list, because pricing is built around your operation. Here is what each plan includes:
| What | Free | Basic | Business |
|---|---|---|---|
| People (company members and staff together) | 5 | 10 | No limit |
| Order templates per location | 3 | No limit | No limit |
| Order schedule slots | 5 | 50 | No limit |
| Schedule slots per supplier per weekday, per location | 3 | 10 | 20 |
| Shift planning: shifts per week | 50 | 500 | No limit |
| Custom roles | - | - | Yes |
| Email addresses for invoices and till reports | - | - | Yes |
When you reach a limit, Spensa tells you in a friendly purple note and offers to set up a call. Nothing breaks; you just cannot add more of that thing until your plan grows.
Each location changes your price
Spensa is priced per location. When you add a location, your subscription grows by one; when you remove a location, it shrinks by one. The form for adding a location reminds you of this: for a running subscription, the increase can be billed right away for the rest of the month. Adding or removing locations needs permission to manage billing.
Your monthly allowance for automatic work
Every plan includes a monthly amount of automatic work. That covers chats with the assistant, reading invoices you send in, and reading till reports.
- The Monthly Usage section on the billing page shows a bar with how much of this month's allowance you have used.
- The month follows the calendar, so the bar starts fresh on the 1st.
- When you pass 75%, a note appears so you are not surprised later.
- When you reach 100%, the assistant and automatic document reading pause until the next month starts or your plan changes. Everything else keeps working: you can still enter invoices by hand, send orders, and use all your data.
If you keep hitting the limit, use the Book an appointment link on the page and talk it through with Spensa.
Managing your subscription
On a paid plan, the Current Plan card shows your plan name, whether you pay monthly or annually, the subscription status, the billing email, and how many locations you are paying for.
- Manage payment method opens the payment portal, where you update your card or bank details.
- Change or cancel plan opens the payment portal too. You can cancel there, and turn a scheduled cancellation back on if you change your mind.
Moving between the plans works differently: plan changes go through a short call with Spensa. The billing page has a booking form for that ("Pick a time to talk through billing, plan changes, or the right setup for your team."). Pick a time, and Spensa gets in touch.
Update payment details or request a plan change
Use the web app as a company admin or someone with billing-management access.
- Open Settings > Billing & Usage and check Current Plan and Monthly Usage.
- To update payment details, click Manage payment method and complete the changes in the payment portal. Return to Spensa and check the payment status.
- To cancel, click Change or cancel plan, review the portal's effective date and consequence, then confirm there only if you intend cancellation. Back in Spensa, check the cancellation notice and subscription end date.
- To discuss a different plan, use Book an appointment, choose a proposed time, and submit the booking form. This requests follow-up; it does not immediately change the plan.
Sponsored accounts may not show portal buttons because Spensa manages their plan directly.
When a payment fails
If a payment does not go through, Spensa tells you step by step:
- First, the billing page shows a payment notice with a Manage payment method button, and an amber "Payment action required" box appears in the sidebar. Update your payment details and you are done.
- If it stays unresolved, the billing page shows "Billing restrictions are active." From then on you can look at everything, but you cannot change things until the payment is sorted. One exception: you can still remove locations, so you can shrink your bill if needed.
If you see the amber box but do not have permission to manage billing, ask an admin to take care of it.
The purple upgrade notes
When you run into something your plan does not include, Spensa shows a purple note with a small lightning icon and a Book an appointment link. You will see these, for example, when picking a custom role on a plan without custom roles, or when inviting more people than your plan allows. On the Free plan there is also a small "Need more room?" box at the bottom of the sidebar. These notes are invitations, not errors; everything you already set up keeps working.
How this connects to other parts of Spensa
- Team and permissions - the Users page lives in settings, and your people count against the plan's user limit.
- Products - product categories you hide here disappear from product lists and filters.
- Menu - menu categories set the recommended markup for suggested sell prices.
- Invoices - your invoice email addresses live on the Inbound email page, and automatic invoice reading uses your monthly allowance.
- POS - the same goes for till report addresses and till report reading.
- Order templates - the number of templates per location depends on your plan.
- Order schedule - the number of schedule slots depends on your plan.
- Scheduling - weekly shifts have a plan limit. Teams and positions are not limited.
- Communication - teams are audiences for news and can have a team chat.
- Assistant - assistant chats use your monthly allowance.
- The phone app - the Offline orders page introduces the app, and the app has its own settings screen.
- Getting started - creating your company and first location happens before you ever open settings.
Good to know
- The user limit counts company members and staff members together.
- If your plan changes to one without custom roles, people who had a custom role are switched to read-only until you give them a standard role.
- If a subscription ends or is cancelled, your account falls back to the Free plan. Your data stays.
- Some accounts are sponsored by Spensa, for example through a promotion. They show a "Sponsored account" badge on the billing page, and the payment portal buttons are hidden because Spensa manages the plan directly.
- Confirmation links for newly added email addresses are valid for 24 hours. You can always resend one.
- Changing your password signs you out on all other devices, which is helpful if you ever lose a phone.
- Deleting your account or your company cannot be undone. Spensa asks you to confirm so it cannot happen by accident.